I’m moving!
February 18, 2011
Update your links! I am moving to Blogger (thanks, Cat, and others who gave advice)! My new blog will (hopefully) reflect the new approach I am taking to my quilting and sewing. Please join me at Stripes & Solids, where my first post is a Spiderweb block tutorial!
Let’s try this again
February 15, 2011
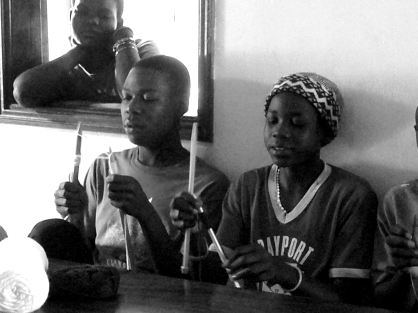
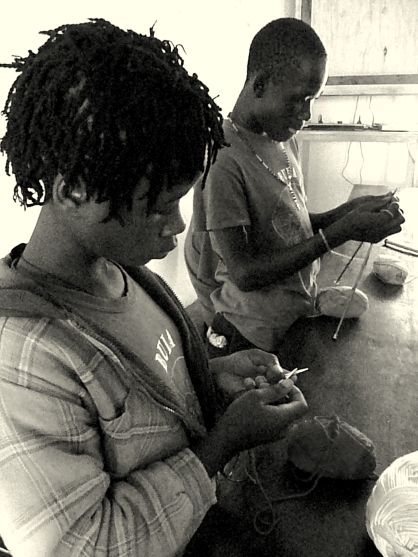
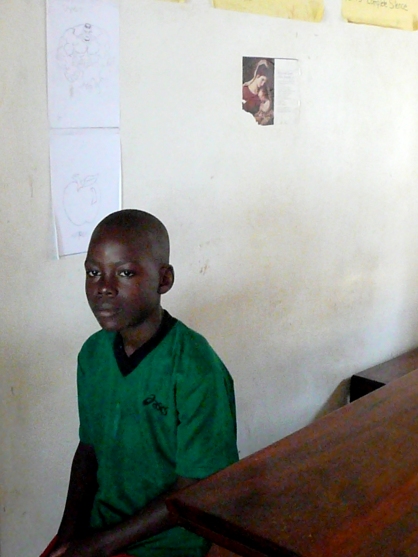
Well, it hasn’t been quite as long since I blogged as I thought: only about five months (if you’re counting). But it feels like forever, and I’ve missed it! The fall was very hectic for me, and (for those of you who don’t know) I spent about five weeks in December and January volunteering at an orphanage in Uganda…during which time I did not really sew at all (of course), although I did crochet and knit every day with the kids and mended more clothing than I will for the rest of my life!
Kids really love crochet–who knew? I left my apartment with about a dozen sets of knitting needles, three crochet hooks, and a suitcase full of yarn, and all of it was gone within three days. I had to troll through the markets of Kampala in search of more supplies for the kids, eventually coming up with only five more crochet hooks and four skeins of white and brown yarn. Not too exciting, but they loved it anyway.
You can see more pictures of my trip here if you’re interested! The one thing I forgot was probably one of the most important things to remember: the battery charger for my camera. I had only one battery bar in the camera when I left, and I made it last as long as I could…which wasn’t long at all, but I did capture a few good images.
So anyway, back to normal life I went at the end of January. I couldn’t even look at my sewing machine when I came back. I felt uncreative and unproductive, and I was out of good ideas for quilts. I was completely uninspired. I realized that blogging had actually helped me stay productive and inspired, even if obsessively reading blogs didn’t. So I trimmed my reader down to a few favorites, as well as the blogs of my good friends, and started to get back into the swing of it.
I traveled to DC for a grad school visit last weekend and snapped an inspiration photo of the wall of the burrito place at Logan Airport. I hope at least some of you know what I’m talking about so I don’t feel completely nuts. If you don’t, there’s a small shot of it on this website. It’s on the left side of the image. When I came home from DC, I turned my inspiration photo into this pillow, which I love:
I used only scraps for this one. There is a wide range of neutrals in many different shades and fabrics. The lightest value is Kona Bone, and the darkest is Essex Linen in Putty (I think…I last used that fabric quite a while ago, in one of my first quilt projects).
(I continue to have issues reorienting my photos in WordPress, sorry!)
Here’s a shot of the back:
I wish I knew what Kona colors I used, but I don’t. I need one of those color cards desperately!
Anyway, I moved in September into a place that has made it much more difficult for me to photograph my quilts. Yall may have noticed that I used to take pictures in the big park that was right behind my apartment building…now, there is nothing behind me but an area where people bring their dogs to go to the bathroom and a storage area for the garbage bins, so I am going to have to get creative! That was a major reason I stopped blogging, but now I really regret not taking pictures of some quilts I made and loved. The quilting on one of them was so intensive that it actually broke my machine, and yet I have no photographic record of it!
I’m also thinking of moving to a self-hosted blogging platform so I have more control over the appearance and layout of my blog (and I do want a new blog name), but it’s actually much more complicated than I anticipated. For those of you who do that…do you like it better? Are you happy you chose it over a traditional blog platform? I’d love to hear your thoughts!
FOs and honesty
August 31, 2010
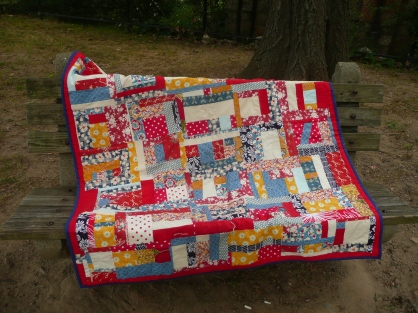
Remember this quilt top? I managed to turn it into a real, live quilt! I just don’t remember when…
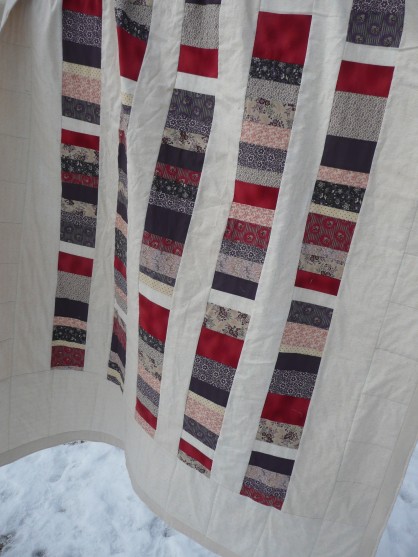
I tied it using some very nice wool I bought at Rhinebeck ’09, in squares that were six to eight inches apart. The ties disappear into the quilt in all but a few places (you can make them out in the solid red spaces).
I bordered the pieced part with a solid red linen, which I don’t advise using for a border because it is slippery, hard to control, and, like all linen, distorts easily. I bound it in Kona cotton, which I believe is the shade called Ocean. And I pieced the back, which I love:
Unfortunately, it is sitting on top of a pile of other quilts I don’t use (eep). That’s not to say I’m not happy I made it: it’s soft and I really enjoyed the process! But it’s a useless size, at about 50″ by 55″. Fine for a newborn baby, but I’m not a newborn baby. I know the clear solution here is to give it to my friend who is about to have twins, but I have already started a zigzag quilt for her (in addition to the courthouse steps quilt I’ve already made), so I’m plowing through. But I don’t know. Maybe I should just give it to her.
Anyway, on that note, I’ve been going through all of my stuff because I’m moving, and I’ve discovered that I’ve fallen into a trap that I dreaded falling into: never using or wearing anything I make (yes, I hear your collective gasp and the choir of angels weeping). I gave every garment I’ve made except two to charity. My finished quilts are in a pile on my shelf, and I do not feel compelled to finish the tops I’ve made. The one thing I use most often is my sewing apron, which I made in a couple of hours last month out of some leftover fabric and which, of course, I’ve never photographed.
So I need to ask: Does this happen to anyone else? Do y’all use what you make? Do you like what you make when you’re finished, or do you stand back and wonder why you spent so much time and money on it? I’m wondering how common this is…and if it fades with experience, or if it’s just a personality flaw of mine.
P.S. Please check out Molly’s burdastyle page, where she posted photos of the absolutely gorgeous skirt she made with the fabric she won from me.
P.P.S. If you want some other “quilty goodness” (a lot of people use this term, so much so that I think it has been incorporated into our vernacular), I posted on the NEMQG blog about our trip to the Lowell Quilt Festival!
I do actually finish projects.
August 26, 2010
I need to tell you this as much as I need to tell myself. I am working on twin quilts for one of my good friends right now, and she informed me recently that twins can come pretty much any day starting about a month before their actual due date, which is October 3. You can imagine my enthusiasm given that I have only one top completed and I am moving next week. Sewing is S-L-O-W.
In other news, I am going to share a doll quilt that I made for the NEMQG doll quilt swap recently. My doll quilt generated the least enthusiasm in the group (just being honest), but I am still happy with it:
I did one double wedding ring block. It took me an entire week.
To be honest, I really loved it and was so proud of it. The DWR block is monstrously difficult and does require hand-piecing, which I did. I took it to my grandmother’s house that weekend to baste it. My aunt, who has advanced lung cancer, was staying with my grandmother at the time. She was also a quilter in her youth, and I was lamenting the difficulty of this project one evening. She hobbled over to me with her walker, stood right next to it, and said in an extremely raspy voice tinged with a hard-core Boston accent: “Monet, that’s a quilt ya make when ya retiahed. That’s a quilt ya make when ya got absolutely nothin’ else to do,” and hobbled away.
So, I won’t be making another one for a while.
Rhea was my recipient, and she did seem to like it despite a few VERY OBVIOUS (and not just to me) imperfections. I was glad to have her as a partner, even though I was a bit nervous because she is such a good quilter and has a real eye for fabric and design!
Here are some of the other doll quilts (see the full lineup here):
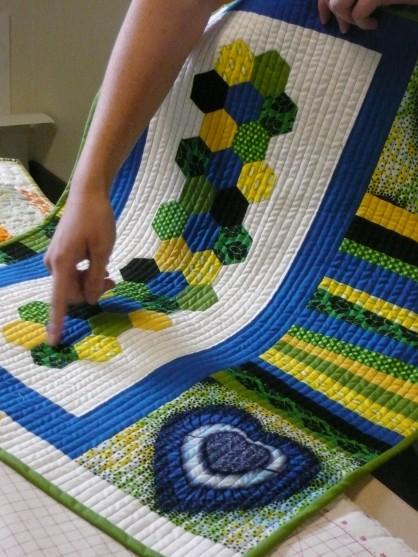 Made by Laurie
 Made by Katie
 Made by Meaghan (incidentally, also the name of her blog [and mine])
Happy sewing, y’all…
Hello, world! (And a tutorial.)
August 18, 2010
I know I have been gone for…well, a very long time. I didn’t even realize how long until my pal Yahaira pointed it out (thanks!). There are a million reasons for this, which I will NOT bore you with here. Instead, I will provide the tutorial I promised a LONG time ago. I can’t even bring myself to look and determine how long ago it was. But I hope y’all know how much I have missed you!
Without further ado…THE FAST AND FUN WAY TO MAKE FLYING GEESE!
Someone in my guild pointed out when I did the demo at our July meeting that it wastes a lot of fabric. She was right; it does. But once you get the hang of it, you can just choose what parts of the fabric you want to focus on, and let the rest go by the wayside. And I would choose fun over fabric conservation any day, as y’all know, since I am more improvisational than most people. But I would urge you to try this and a different method at the same time and see which you prefer. I will be surprised if you ever look back after you try this!
I would like to note that the picture quality is sub-par and that there is text on some of the images because I used them in a handout, but this should not impede your ability to make fabulous FGs from this tutorial.
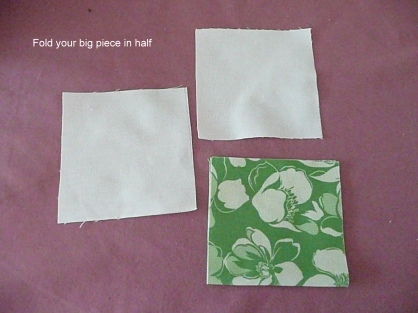
Step 1: Start with three pieces of fabric: two squares and one rectangle. Your rectangle should be the exact size that your two squares would be if sewn together. This means that, for example, you could use a 4″ by 7.5″ rectangle with two 4″ squares (that is what I use in this tutorial).
Other good sizes are: 5″ by 9.5″ rectangle with two 5″ squares, 3″ by 5.5″ rectangle and two 3″ squares…you get the point. Don’t think about the math too much. You wouldn’t really want blocks any bigger or smaller than these anyway.
Step 2: Fold your rectangle in half:
Step 3: Place it on top of one of your squares. Then place the other square on top of that. This is called “making a sandwich” (cheesy, I know).
Step 4: Pin them together near the four raw edges.
Step 5: With the raw edges closest to you, sew along the right side of the sandwich with a 1/4″ seam.
Step 6: Open up your sandwich
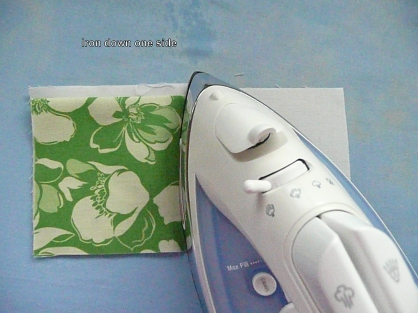
Step 7: Iron down one side (I do the right side because I am right-handed)
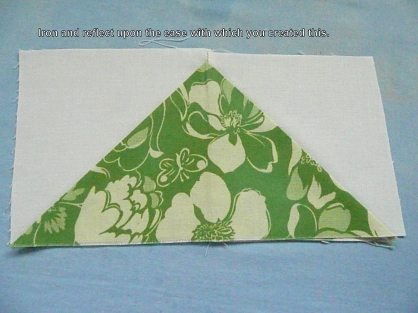
Step 8: OPEN and watch the magic happen.
Step 9: Iron and reflect upon the ease with which you created this.
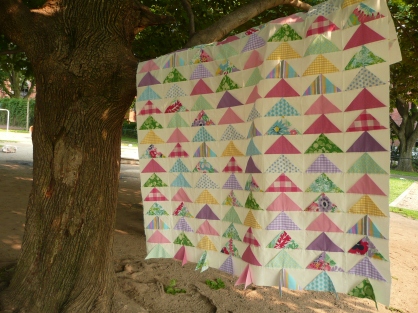
This will be a little weird at first. Do it once, carefully, and you will have the hang of it already! And you will easily be able to make a top like this one:
Be careful when you sew the blocks together, though. They sit on top of the background fabric (as you can see in the bottom photo), and you don’t want them to pouch out. You want them to lay flat to make it easier for you to quilt it.
I would like to note that I have not progressed very far past where I was when this photo was taken…I have only added one of the two borders I plan to add. But I love it as much as the day I took this photo!
GOOD LUCK and if you do this, please e-mail me or comment here and tell me what you think of this technique! And also, please e-mail or comment if you have questions!
I’ve missed all of you very much!
Winners and “American Woman” mini-review!
June 30, 2010
Thank you so much for all of your amazing comments…I have just come back from my weekend away and am in the middle of responding to each of you. It meant so much to me to read all of your kind words. I have been feeling less than confident about my sewing this week because I have attempted the Double Wedding Ring block, and it is slow moving…I’ve spent almost a week on a single block. Yikes! Y’all are raising my sewing self-esteem.
Anyway, the winners were Molly (blogless–garment items) and Yahaira (quilting items). I am delighted to send each of them their packages! Thanks to all who entered, and hopefully I will have another giveaway soon.
I did go to the exhibit at the Met, as promised. I admit that I am not as passionate about the fashions of the 1900s-1930s as, well, any other era, but I really couldn’t wait to see the American Woman exhibit. I feel guilty saying this, but I was a bit disappointed. The trip was worth it because the Met reopened its American wing and created visual storage. I went to see the American Woman exhibit on the tail end of my visit because I got sucked in by the period rooms in the American wing. I thought I may not have enough time (an hour), but I was wrong.
I think the experience would be very different if you did not sew and were able to appreciate it overall, instead of fixating on the minor details. The collection was good, but not great. Each room featured about eight to ten mannequins wearing different outfits of the era, as well as sparkly and sequiny wigs that did not correspond to most of the exhibits or the outfits overall. The wigs themselves were interesting, but they were confusing in conjunction with the styles (particularly the House of Worth gowns).
The exhibit was organized thematically as well as chronologically, which left out some important pieces from each designer. The manner in which the models were placed made it difficult for them to display larger pieces as well. They were each on a raised platform, which you could stand relatively close to. The House of Worth had only four or five dresses in the 1890s section, and they were all “typical” House of Worth: sequins, lace, etc.
I would have liked to see some of their statement pieces, such as the following:
They were all very monochromatic in the 1890s section, and a couple of the more detailed dresses were black. The lighting was low, and it was difficult to make out the details (again, I think that is a sewer’s issue!).
The second part was the Gibson Girl, and I wish I could tell you about it, but I was being knocked over by crowds of rowdy teens, so I strode on through. The women’s suffrage movement was next, and they had videos about the movement playing in the background. The clothes weren’t beautiful, but they revealed a lot about social concerns and attitudes about femininity at the time. The videos were projected all around the room…I’m still not sure how I felt about them. They were powerful, but distracting.
The flapper movement followed, and I enjoyed that very much. I think you would appreciate it less if you did not sew and did not understand how much handwork went into these dresses, but they were absolutely gorgeous, if not very fragile. The dresses were in remarkably good condition considering their fragility and delicate beadwork. The exhibit did a good job of highlighting both the enormous range of details and the similarity of the silhouettes. The glittery wigs also worked nicely with these mannequins. The room was simpler to navigate and digest than the others.
Finally, they did something about movie stars, and I honestly forget the name of the section. Sorry! This section displayed what many people would consider the highlights of the exhibit: the drapey dresses of Madeleine Vionnet and her 20s-30s contemporaries, which you would see worn by starlets in early movies. Like some of the other rooms, this one played movies on the walls. They showed the dresses in their original form, which I liked…context is always good. But my biggest issue with the entire exhibit was in this room, because they showed one of Vionnet’s dresses on a seated model. Vionnet is known for her draping…her work certainly does not belong on a seated model. It bothered me more than it should have, though.
Finally, they had you walk through a room with a video montage displayed on some gray walls into a rather annoying gift shop. The montage contained such “American women” as Candice Bergen, Janet Jackson, and Jennifer Lopez. They had, of course, 30 million copies of the book High Style, which is actually a very nice book that records their collection. I wanted to buy it, but I was being kicked out, and I had already been yelled at by a security guard for trying to take a FLASH-FREE photo, so I was sad. I made myself feel better by going and taking this photograph (legally) of my namesake:
Most important, though, the exhibit did NOT make me want to run home and sew a new dress, which was not a good sign.
I am so sad to be negative about it! I don’t want to say it was wholly not worth going because I am happy that the museum is exploring material culture and the history of dress. I am actually happy that there were a million angsty teens there, because I hope it will encourage them to learn more about the context of fashion and perhaps develop an interest in garment-sewing or textiles as well (even though they kept knocking me over like I was a frail, 90-year-old lady with a cane, rather than a relatively fit person in her 20s). To this end, the museum did a fantastic job of providing a great deal of historical and social context for each era…and everyone was reading and discussing the explanations. I do commend them on that.
Final verdict: If you are already in NYC, go to it, but go to the new American wing first.
*all photos were taken from the website of The Costume Institute
It’s my sew-iversary!
June 25, 2010
Dear friends,
June 26th is my six-month sew-iversary, and I want to share this momentous event with you by having a small giveaway. But first, I would like to take this opportunity to reflect on the first half of 2010.
I can’t believe I have only been sewing for six months. Truth told, I did own a sewing machine (a 1940s-era Singer) back in ’08, and then it broke after about three months (and I still need to have that fixed). I made a dress with my mom once, long ago, and then I incorrectly took in an area of a nightgown that had a gap in the bust sometime last year. I sewed it wrong sides together, and pinched it outward, instead of in…and I STILL wear it that way, partly out of laziness and partly as a reminder of everything I’ve learned. Those were really the only two things I had ever done before Christmas 2009.
I have, however, been exposed to the language and practice of sewing for my entire life. My mom sewed clothes and home goods while I was growing up (and now she makes a living doing it), my grandmother sewed, and my great-grandmother and great-aunt quilted, as you can see in the photo below (thanks, as always, to Caro):
I followed sewing and quilting blogs for a while, but I mostly knitted and crocheted; I always saw sewing as my mom’s “thing,” and I never thought I could be as good as she is, so I just never picked it up. And I think I took it for granted when I was growing up, too. She had tried to teach me to sew at some point by drawing shapes on paper plates and making me sew along the lines–my earliest exposure to paper-piecing! 🙂 I had also looked at a lot of quilting and textile traditions, taking a more studied and less practical approach to them through 08 and 09.
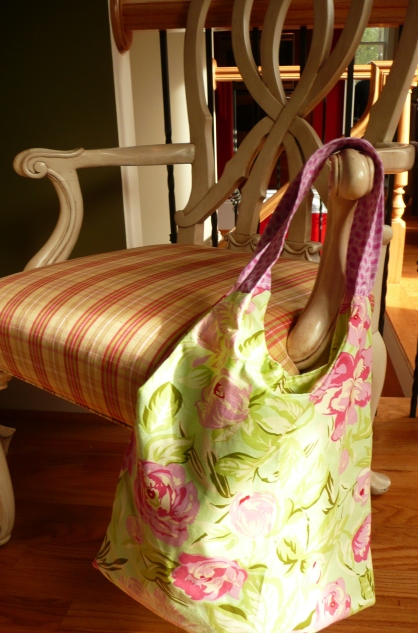
But I became obsessed with owning a sewing machine in October of last year, and my parents gave me one as a Christmas present. I bought myself a copy of Joelle Hoverson’s Last-Minute Patchwork and Quilted Gifts in anticipation of the event. I got my machine and made this Amy Butler bag I have actually never posted about the next day:
My mom and her quilting friend Beth took me to the local quilt shop the day after that, and I bought up a bunch of Civil War repro fabrics. This was my first quilt:
From there, quilting kind of took over my life, and then garment sewing did, too. A month or so later, I posted on Alissa’s blog that I would definitely join a modern quilt guild in the New England area if one existed, and she e-mailed me and two others and asked us to create one. The other two people had a lot going on in their lives at the time, and even though I knew basically nothing about quilting, I did know a thing or two about creating groups, so I just plowed forward. Starting and then running NEMQG has been an absolutely incredible experience, and I can’t say how proud I am to be a part of an organization full of such beautiful, kind, and inspiring people.
Along the way, I’ve made so many amazing blog friends, and I’ve learned more than I ever thought possible in six months. I’ve also completed all of this (and thrown away several ugly things I made, but never photographed):
Including all of the trashed FOs y’all have never seen, it’s an average of five FOs a month (and I always complain about not having time to sew!). It’s very clear to me that I slowly developed an aesthetic that is true to who I am over the last six months. My preferences in both quilting and garment sewing lean heavily toward vintage and traditional, but with more modern/ brighter color schemes. After trying out a few of the quilting trends (wonky, red/ gray, etc.), I can safely say that I am more drawn to traditional patterns and vintage/ thrifted or vintage-look fabrics. Obviously, the same goes for garments, as I sew almost exclusively from vintage and vintage-inspired patterns, despite their difficulty (and oh, how difficult they have been at times!). My craft bookshelf consists mostly of books that describe old quilting traditions and established quilting communities, as well as late 40s to early 60s fashion.
Looking back makes me very emotional. So much has changed for me since I started sewing and the guild. I feel like I have established a true connection with a community, and created a stronger bond with my family as well. I want to thank each and every one of you for reading my blog, for your support and inspiration, and for being a part of my life.
Now for the giveaway!!! There are two. One is for garment sewers. I have two vintage patterns, Simplicity 3358 and Simplicity 5054:
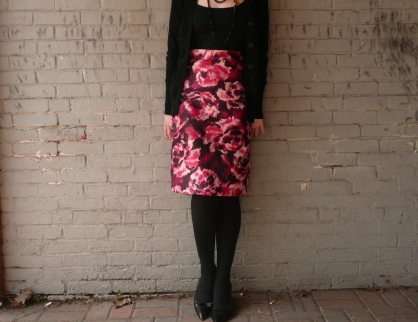
I’m also offering about 1 3/4 yards of the fabric I used to make this skirt:
It has vivid color, good drape, and is very wearable.
For all you quilters out there, I have quarter-yard cuts of these fabrics (from Paula Prass’ Woodland Delight and Denyse Schmidt’s Hope Valley):
A full yard from Amy Butler’s Lotus:
…AND a surprise from this line:
All you have to do is leave a comment telling me what your favorite hobby is! I don’t care if it’s quilting, sewing, or tatting lace. Actually, I’d love to see someone say that tatting lace is their favorite hobby. I’ll draw a winner on Tuesday, June 29 when I return from seeing the new exhibit at the Costume Institute in NYC (and stopping at Purl).
Thanks for entering…and for reading all the way to the end! If you’re here, I commend you on your stamina.
160 down!
June 22, 2010
Well, first things first: thank you so much for your sweet and lovely comments on my skirt! Y’all are amazing! I felt so good when I read them, and I promise I will make the tutorial for you, since I received a few comments and e-mails about it.
I know I vowed to start documenting my progress on my projects, so I’m going to give you a look at my flying geese quilt top (or at least what I have so far). The tutorial I promised will not be posted until after I teach the block at the next NEMQG meeting. That way, I can see if there are any issues with my explanation or presentation.
So, I painstakingly squared up all 161 of my goose blocks (my count was off). Squaring up is the one thing I don’t like about quilting, I’ll admit…it really ruins it for me, and usually I have to break it up across several days or weeks, which is why this top is taking me so long.
The main fabric is a recycled cotton skirt from the 60s. You can see it in the photo as the fabric featured in five of the blocks. Most of the rest of it came from scraps and some other recycled bits…although I did have to buy some new fabric as I neared my final count and began running out. The top is about 60×70 so far, and my plan (surprise, surprise) is to create a thin, pink border and then a large white border.The solid is Kona Bleached White.
This is, without question, my favorite quilt top I’ve made so far. I am absolutely in love with it.
So is the cat.
I have an important anniversary coming up, so I am going to be hosting a small giveaway this week…stay tuned!
More Dior!
June 18, 2010
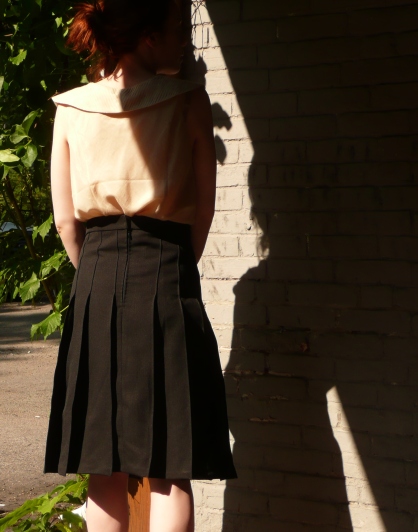
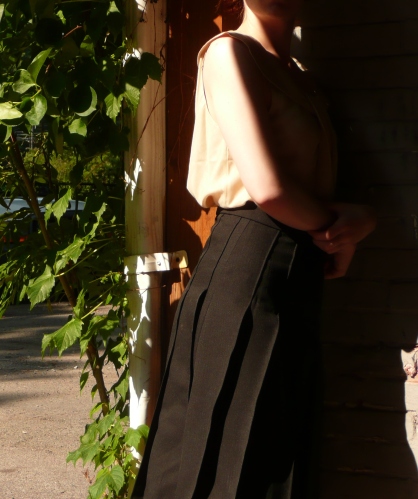
This is not news to any of you, but I am more than a little bit obsessed with the Dior House (from when it was Dior’s Dior house in the 50s, of course, not the current Dior house, mass producer of bad perfumes and bean-shaped bags). I was reading Alexandra Palmer’s Dior* last month and I became overwhelmed by the desire to make something Dior-inspired rightthisminute. Most things in that category, of course, would probably take me a year, so I chose a simple, pleated black skirt with slightly textural fabric. One non-vintage (GASP) pattern later, and here you have it:
Butterick 5285, how I adore thee! You combine the best of both pleated skirt worlds: knife and box. Your instructions are clear and you fit with little tweaking. The major caveat here, of course, is that making a true knife pleat requires far more than “matching large dot to small dot.” If you’ve never made a pleated skirt before, you are in for a treat/ a lot of work. Crafting a true knife pleat that sits like a pleat in perpetuity requires no skill, but a great deal of patience.
Butterick does an extremely poor job of explaining this, and their photo does not look like your FO would look if you only used their instructions. A sharp pleat requires constant ironing into submission, hand-basting of every pleat, topstitching and edgestitching on the front and back of every pleat…the whole shebang (if y’all want a tutorial on this, I will make one).
The fabric is a heavy suiting fabric with a barely discernible texture (other people can’t see it, but I can and I love it); the zipper and hem, as always, are hand-sewn. And here’s the rub: if you REALLY want your pleats to sit right, you should hem both pieces separately either AS SOON AS THEY ARE CUT (double gasp). Learn from my mistake, please! I had to rip out all of my hand-basted pleats, hem the skirt, and then re-do the hand basting…thank God for Angela Lansbury and MSW.
But as long as you know that you should basically ignore their relevant construction suggestions, this is a great pattern. Really, I mean it. It fits how and where I like it: high on the waist and snugly through the lower abdomen. The length is great and the pattern pieces make sense and are easy to use. I think it is a must-have and is well worth the $17 I paid for it at my fabric store. I am sure I will use it again. It’s just too bad I used bright blue basting thread on the zipper and I walked around all day with leftover blue thread stuck to my bum :(…
*A very short book review: this book is excellent as a review of the establishment and business of the Dior house (including the historical context in which it was created), but if you want pictures of Dior’s many gorgeous creations, you should look elsewhere. There are, at most, ten photos of his dresses in here.
Grandmother’s tablecloth
June 15, 2010
Hello, friends! As I said earlier, I had to put all of my projects away last week to make my nana a tablecloth for her 83rd birthday. She has been talking about this tablecloth she saw in a catalog probably 50 years ago for a good couple of years now, so I seized the opportunity to sew one up for her, even though I didn’t have a photograph for reference. She asked for 14″ yellow and white squares. Easy enough.
Two trips to Fabric Corner later (apparently NOT easy enough to buy the right amount of fabric the first time) and some quality time with my giant cutting mat (and season 2 of Prime Suspect), I had the top. I sewed up the bottom and painstakingly laid them out on the floor. Then I ironed and pinned them all out into a lovely 70″ square…only to realize, when I stood up and reflected on my handiwork, that I had basted the layers together like a quilt (ie, wrong sides together), not pinned them together like a tablecloth (right sides together). <sigh> Old habits die hard.
But I finished it and gave it to her on Saturday, and she seemed to like it…
…which is, of course, the only important thing!
Unfortunately, I’m terrible at recording the colors of Kona I buy, but I do know that the white is Bleached White, which is my personal favorite…I think it’s a truer, brighter white than the others, and it looks great with bright colors and pastels alike.
Happy sewing, whatever you’re making!
